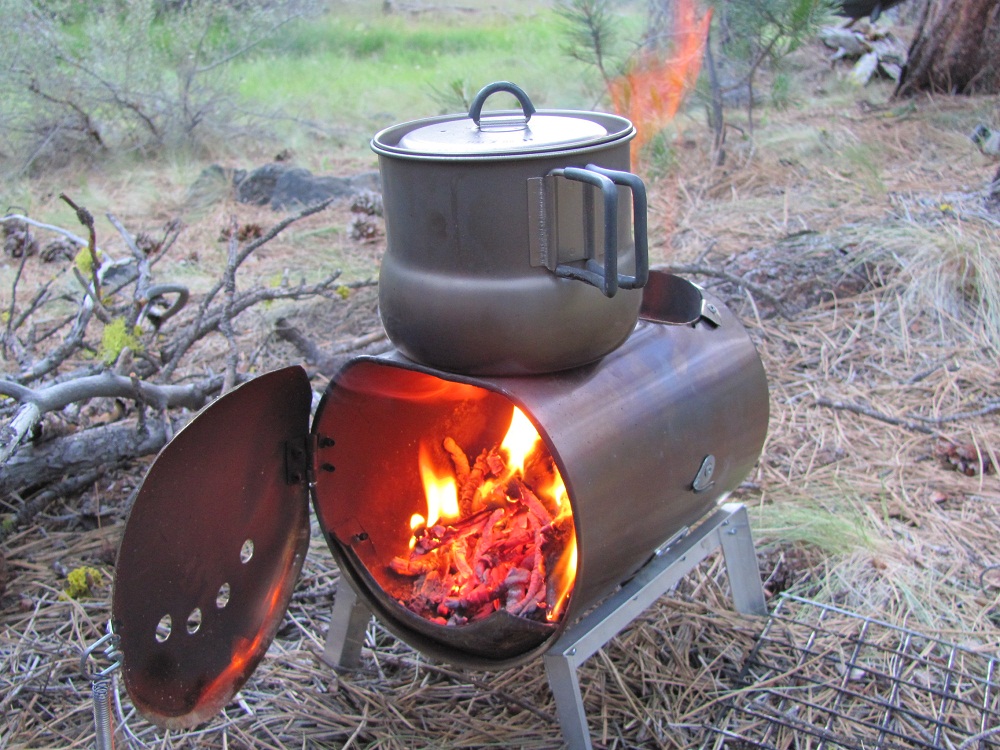
If you have a little bit of do it yourself ability and some spare time, this stove is the one you want. It performs considerably better than a comparably sized box stove, and is very easy to set up. Going from this stove back to a box stove is an exercise in frustration because this one draws, burns, and loads so much better. The only catch is you've got to make it yourself. The heavier of the two stoves pictured weighs 1.5# without the stove pipe.
Here's a little bit of a primer on how.
- Go to WalMart and buy a stainless steel silverware canister. Both stoves pictured above were made out of the 6"x9" size, but there is both a larger and smaller size. The canister comes with a glass lid and is under $10.
- Figure out what size of stove pipe you want. The only place I know of to order a stove pipe at a reasonable cost is TiGoat. Buy the larger diameter in whatever length you need. If you have the even larger diameter Kifaru pipe already, that works as well.
- Use a dremel tool with cut off wheels for all of your cutting. Wear eye, ear, and respiratory protection. Cutting curves with a flat wheel kicks off a lot of dust and eats wheels quickly, but I haven't found another good way to do it.
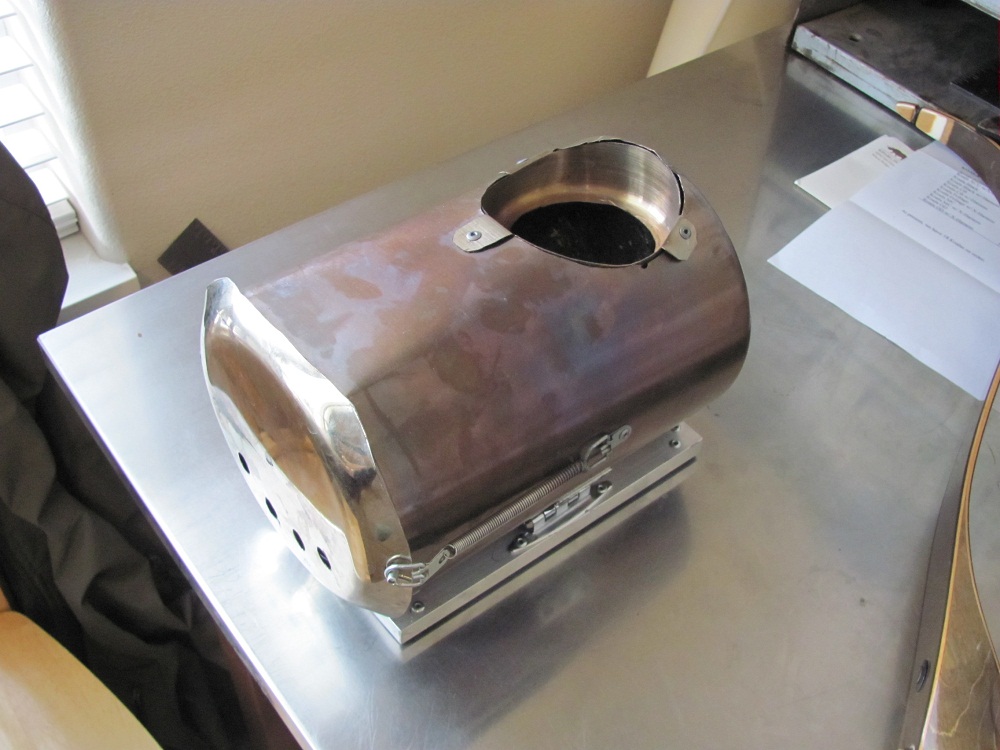
- Cut the pipe opening to size, leaving tabs for the pipe to sit in. The inset stainless cup shown in some of the pictures works for multiple diameters, but adds weight and a lot of labor. The tab method is probably better.
- Use two short pieces of 2"x4", one inside of the canister and one outside of the canister. Clamp them together with C-clamps to create a flattened surface to cook on between the pipe opening and the front door. Tighten the clamps together until that section flattens.
- Fabricate the legs. Use steel (not aluminum) pop rivets to rivet together legs out of 3/4" aluminum angle. The uprights are 4" long and the horizontals are about 9" long and 8.75" long. You want one side slightly less long so the legs fold together with one fitting into the other as show in the pictures.
- Put a single hinge in the center of each leg. You are putting the hinge on backward so when the legs are splayed out, they can't open any more. Play with it before you rivet to make sure you've got them going the correct direction.
- Now fold the legs together and set them on the bottom of the stove so you can see where the hinge gets riveted onto the bottom of the stove. It should work out so the legs fold together flat underneath the stove, or open up with enough splay that any downard pressure on the stove just wants to open the legs further which is prevented by the way the hinge is set.
- Next you have to figure out a door and latch mechanism. The door shown above was cut out of a cheap stainless plate and simply has a hinge on one side and spring latch on the other. The spring latch only works if you are wearing leather gloves. I'm always wearing leather gloves so I haven't improved on it. There are better ways. Superbadger, who provided some of the pictures above, has a different door setup entirely, which he'll probably post some pictures of on the accompanying thread.
- The key to the door is nice low vents. Leave maybe 1/2" between the floor and the vents. Not much more than that. That's one of the secrets to why this stove runs so well. To cut the holes, I used a drill and cutting oil and went slow so as not to create massive galling in this lightweight stainless.
- The inner lip shown on the one stove in the pictures above probably isn't necessary. Superbadger has a couple of burns in his without the lip and it seems to be fine. That simplifies and saves weight.
- For a spark arrestor, I just put a stainless sink strainer over the top of my stovepipe on the outside of the tent. If you want to get fancy, you can cut slots into the bottom of the pipe for spark arrestor and sheet metal damper.
On the trail, I keep the stove in a stuff sack to protect other things in the pack from soot and sharp edges. I keep a food bag on the inside of the stove itself to use that unused space.
For additional discussion and to ask questions, go to this thread on our forum. Have fun with your project!